Mastering the Layered Starfish Lighthouse SVG for Professional Wood Art
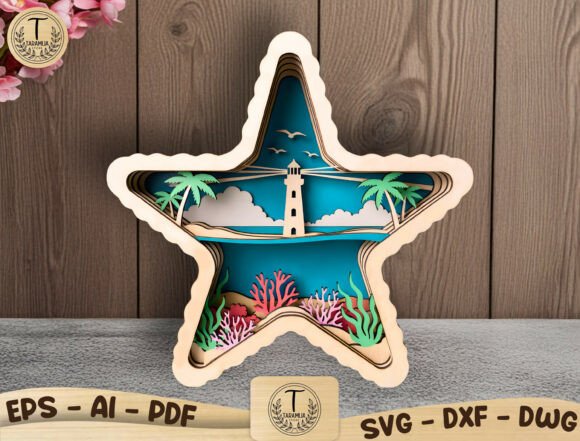
There is a distinct satisfaction in watching a flat sheet of plywood transform into a dimensional coastal scene, but the difference between a amateur-looking project and a stunning piece of wall art often comes down to the file you start with. The Layered Starfish Lighthouse SVG has become a favorite among laser cutting enthusiasts and small business owners because it encapsulates an entire beach narrative—lighthouse, palm trees, ocean waves, coral reef, and flying birds—within a unique 3D star shape. However, simply downloading a file and hitting "cut" is rarely enough to achieve professional results. Many creators overlook critical details regarding layer separation, material compatibility, and assembly logic, leading to wasted materials and frustrated customers.
When evaluating a design like this for your next project, whether for a summer craft fair or a custom nursery order, understanding the technical nuances is just as important as the aesthetic appeal. This guide walks you through common pitfalls associated with layered vector files and offers practical corrections to ensure your final product reflects the quality of your effort.
The Trap of Poorly Separated Layers
The most frequent mistake beginners make when working with complex layered designs is assuming all SVGs are created equal. A low-quality file might appear complete on the screen but lack proper separation between elements. In a Layered Starfish Lighthouse SVG, depth is achieved by stacking specific components: the background ocean, the mid-ground coral, the lighthouse structure, and the foreground starfish frame. If these layers are not cleanly separated in the vector data, you will find yourself spending hours manually ungrouping paths in software like LightBurn, Illustrator, or Inkscape.
Why this matters: Manually fixing a bad file introduces human error. You might accidentally delete a crucial anchor point or misalign a cut path, resulting in pieces that do not fit together during assembly. Furthermore, if you are producing these for commercial sale, time spent fixing files is time lost from production, directly eating into your profit margins.
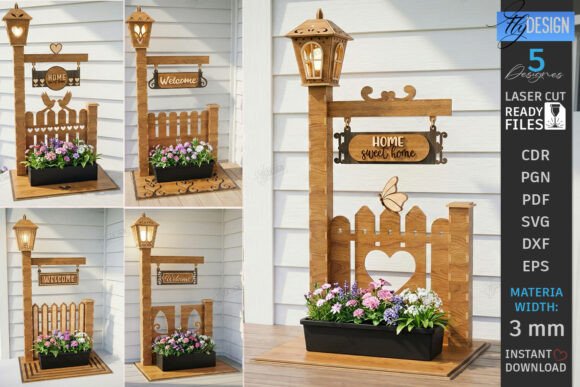
The better approach: Before purchasing or downloading, verify that the file includes distinct, named layers for each depth level. A professional file intended for 3mm or 1/8 inch plywood should have clear distinctions between cut lines and engrave lines. Look for formats that offer flexibility; having access to DXF, AI, EPS, PDF, and DWG alongside the SVG ensures you can open the design in whatever software your laser cutter prefers, be it a Glowforge, xTool, OMTech, or Thunder Laser.
Misjudging Material Thickness and Tolerance
Another common oversight involves material selection. While the design is optimized for standard 3mm (approximately 1/8 inch) plywood, not all wood products are created equal. Birch plywood, MDF, hardwood, and even acrylic behave differently under the laser. A frequent error is ordering materials without verifying their actual thickness. "1/8 inch" plywood can vary significantly between manufacturers, sometimes ranging from 2.8mm to 3.2mm.
The consequence: If your material is thicker than the design accounts for, the layers will not stack flush, causing gaps or forcing the frame apart. Conversely, if the material is too thin, the joints may be loose, compromising the structural integrity of the shadow box effect. This is particularly problematic for hanging wall art, where stability is key.
Practical advice: Always measure your material with calipers before running a full batch. If you find a variance, adjust your design scale slightly or account for the difference in your assembly strategy. For a polished look, consider painting the edges of the plywood layers before assembly. This simple step hides the raw wood grain on the sides and adds a pop of color that enhances the 3D illusion, turning a standard wooden cutout into a vibrant piece of beach house décor.
Overlooking Commercial Licensing and Usage Rights
For entrepreneurs and freelancers selling handmade goods at craft fairs or online, understanding licensing is non-negotiable. A significant misunderstanding in the creator community is assuming that purchasing a digital file grants unlimited rights to resell the digital asset itself. Most reputable designers, including those offering high-quality nautical themes, allow commercial use for physical products only.
The risk: Reselling the SVG, DXF, or AI files themselves violates copyright and can lead to account bans on marketplaces or legal issues. Additionally, using a file without checking its license might restrict you from using it in certain types of mass production.
What to check: Ensure the product description explicitly states "Commercial use for physical products allowed." This confirms you can cut the Layered Starfish Lighthouse SVG into wood signs, gifts, or décor items to sell, but you cannot share or sell the digital source files. This distinction protects both the original artist and your business reputation.
Assembly Errors That Ruin the Depth Effect
Even with a perfect file and correct material, the assembly process can make or break the final presentation. A common error is using the wrong adhesive or applying it inconsistently. Using too much glue can cause squeeze-out that stains the wood or creates visible bumps between layers, ruining the smooth, dimensional look of the ocean waves and lighthouse.
Impact on quality: Visible glue marks or misaligned layers distract from the intricate details, such as the flying birds or the texture of the coral reef. In a nautical nursery setting or a coastal home, these imperfections are easily spotted and diminish the perceived value of the piece.
Solution: Use a dry-fit method first. Assemble the layers without glue to ensure everything aligns perfectly within the starfish frame. When you are ready to bond the pieces, use a fine-tip applicator for wood glue or double-sided tape designed for crafts. Apply adhesive sparingly to the back of each layer, focusing on areas that will be hidden once assembled. For added durability in shipping handmade wood gifts, consider adding small brads or pins in inconspicuous areas alongside the glue.
Choosing the Right Finish for Your Environment
Finally, consider where the finished art will live. A piece designed for a humid beach house requires different finishing than one destined for a dry indoor nursery. Neglecting to seal the wood can lead to warping over time, especially if the layers are made of untreated birch or MDF.
Recommendation: Apply a clear sealant or varnish suitable for your chosen material. If you are painting the layers, ensure you use paints that adhere well to wood or acrylic. A matte finish often looks more sophisticated for modern coastal décor, while a glossy finish can mimic the wet look of ocean waves. Testing your finish on a scrap piece of the same material before applying it to your final project is a small step that prevents costly mistakes.
By paying attention to file quality, material tolerances, licensing terms, and assembly techniques, you can elevate your projects from simple cuts to professional-grade art. The Layered Starfish Lighthouse SVG offers a beautiful foundation for creativity, but your attention to detail is what brings the coastal scene to life. Whether you are creating a one-of-a-kind gift or building inventory for your shop, these precautions ensure your work stands out for all the right reasons.